
Isn’t this just the coolest Matt item never built!?
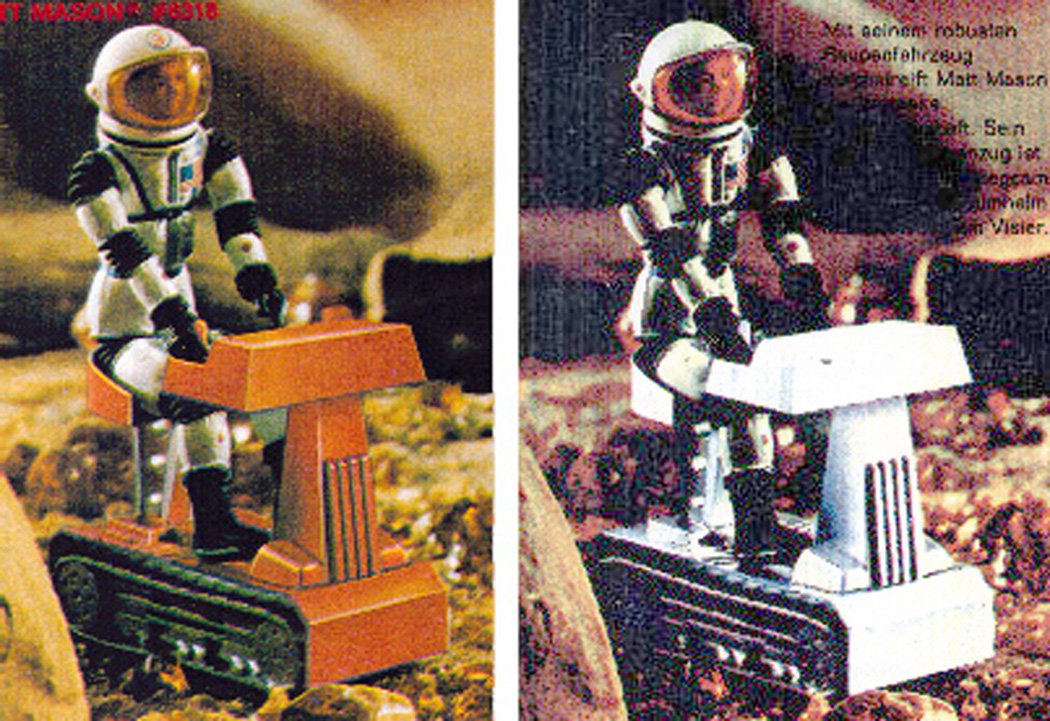
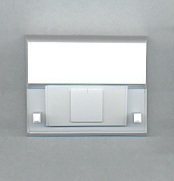
These are early catalogue images released to stores, but show prototypes and not what actually shipped. I am constructing the red Matt Mason prototype Cattrac out of sheet styrene.
Planning:
I started this project by examining the 3 images of this vehicle (shown above) and deriving as much information as possible from them for use in the plans. This was not a simple process since all three images were heavily retouched, and obviously distorted. Where I was unable to work out a dimension, I used a real cattrack (a final production run toy – not a “real” one). I was however quite careful about not deviating from the progenitor shape (which I like so much and was the whole reason for me attempting this construction in the first place).
Distortion was most apparent (and troublesome) on the top steering console. If one was to make this model exactly as shown in the images, it would most definitely have a crooked console, or at least one shifted off-center.
Parts of the progenitor Cattrack (I’ll call this CT1 from now on) do not work well with the figures. Foot cups are too small, the seat was too high, front bumper is too low, etc. However, I tried to leave as much of this intact in my version as was possible.
In the drawings, I used the millimeter as my base unit since it seemed to make the planning process easier and I was able to transfer the dimensions to the styrene much easier than using imperial fractions. The plans are drawn in Adobe Illustrator and this allowed me to move shapes around freely and do a sort of “dry fitting” of virtually all pieces prior to actually cutting them out.
Materials:
I’ve been building models virtually all my life (if you count Lego) and I have a fairly good grasp on how to work in scale. The best material for this construction is sheet styrene which is easy to cut, sand, bend and glue. Since the CT1 was probably assembled from cardboard (mattboard, shirtcard or something similar) and then painted, I figured I could assemble a styrene equivalent with 2 different thicknesses which should match what I see in the pictures. Sheet styrene is easily obtainable from any hobby store, or a store specializing in model trains, and is not very expensive. You can also get styrene solvent (not tube glue) and all the tools and materials you’ll need from these sources. It’s always a good idea to make a shopping list as you examine each part of the project.
One good rule in model making is “figure it all out now.” If you don’t, you could end up with half a finished model in your hands before you discover that the next part not only has to be made one specific way, but that it won’t work at all with what you’ve already made. I admit that I break this rule regularly. I find that I’m a strike-while-the-iron-is-hot kind of guy, and as such I haven’t totally figured out the tracks yet.
Here is a rough shopping list:
Sheet and Strip Styrene (Evergreen Scale Models):
– .080″ thickness (2.0 mm) Plain
– .030″ thickness (0.75 mm) Plain
– .030″ thickness (0.75 mm) V-Groove
– .125″ x .250″ Strips
– .100″ x .125″ Strips
Other Tools and Materials:
– Styrene solvent
– Solvent syringe
– X-Acto knife (recommend #11) and handle
– Metal straight edge (or steel ruler is fine)
– Fine sand paper, various fine grades
(I recommend Testors sample pack – multicolored. It’s washable and therefor reusable)
– Something to measure your cuts. I used a Vernier caliper and dividers (and a compass), but a machinists steel ruler (small one) is good too
– A small set square at 45/90 degrees (or mini carpenters square) is always handy.
Building the Base
 Here is the base so far. Two different thicknesses of styrene are used here, as well as styrene rods and bars. Small pilot hole were drilled for the axles (you can just make them out here – I used my scanner to make all these pictures since I don’t have a digital camera). I had planned to make the track part actually work, but I am having difficulty obtaining suitable wheels and belts. I have several options open to me here so I will keep looking for materials and then make my final decision which way to assemble the tracks. No matter how I choose to do this, it should fit nicely into what I’ve done so far.
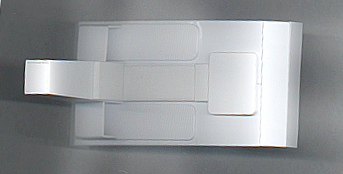 The upper part of the base is nearly complete with the addition of foot cups and sole grips. The center floor console will have water-slide decals eventually (after the paint is applied) I will be using other Matt mason sticker art as a guide when I design these console graphics.
The front of the CT1 is made from styrene strips (available in many different sizes from Evergreen) Each vertical was precisely cut, sanded and solvent welded using other pieces of styrene as spacers. I think this worked out OK and the look is very close to what I wanted.
The Seat
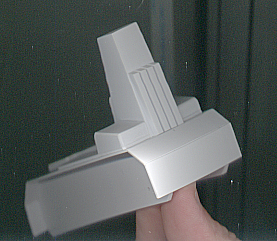
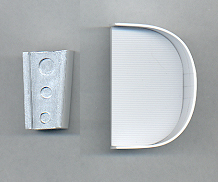 The seat’s riser was a bit tricky since I don’t have the tools necessary to properly drill thick styrene. I made the support out of several wedge shapes and then used thin styrene sheet with shallow holes in it to cover and give the approximate look. I think it will do for now. I may replace this later once I have access to the right tools. I painted it with silver paint to see how the final will look (I’m just too impatient).
The top of the seat was cut using a compass with a fine stencil knife attachment added. I was then able to cut two careful arcs in a thin sheet of styrene. This made a template from which to make the thicker shape for the actual seat base.
The back of the seat was then solvent welded and held in place with masking tape until completely dry. I did this in stages so that the curve would be natural. Melting styrene with heat can often be more trouble than just gluing it in place and allowing it to be fixed under tension.
The upper part of the seat is a second piece of styrene with very fine grooves cut in it (you may just be able to make this out above). I bought it v-grooved like this, and when painted in black semi-gloss, should look very good. This same material was used as the sole grip pads on the base.
The Console
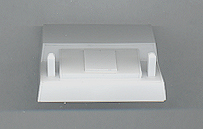
 The console of the CT1 is distinct for it’s large front face. The top is obscured in all reference images, so it is modeled on the CT2 (Mattel’s production Cattrack). Custom water-slide decals will be applied here after paint to give it the look of some of the fine detail I suspect would have been on it. I’ll probably look at using a derivative form of graphics from the Crawler or the AstroTrac.
The Trac
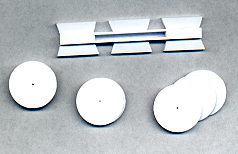 Still a work in progress. I started to make it out of styrene but it may not look like what I want so I may changes materials for these wheels. The main issue is that I have to drill shallow indents into the face of the wheels, and if you’ve ever drilled soft styrene, then you know where I’m going with this. I may switch to MDF or maybe another type of plastic. We’ll see.
More on this build later.
When you finish this project I’d love to see pictures.
Now that spring is here (in the northern hemisphere) I may be able to paint the parts red and make some headway with this sometime soon.
Excellent! Look forward to seeing it.